How to add bottom connector pieces to join floating parts
Floating parts won't print as one piece. Here's how to spot islands, Auto-connect them, and add any manual bridges - then download or order your finished cutter.
Step 1: Review for floating islands
Rotate the 3D preview. Any interior shape not touching the main wall is a floating island and needs a connector so the cutter prints as one solid piece.

Step 2: Auto-connect islands
Select Auto. The tool adds bottom connectors from each island to the main wall. This resolves most designs instantly.
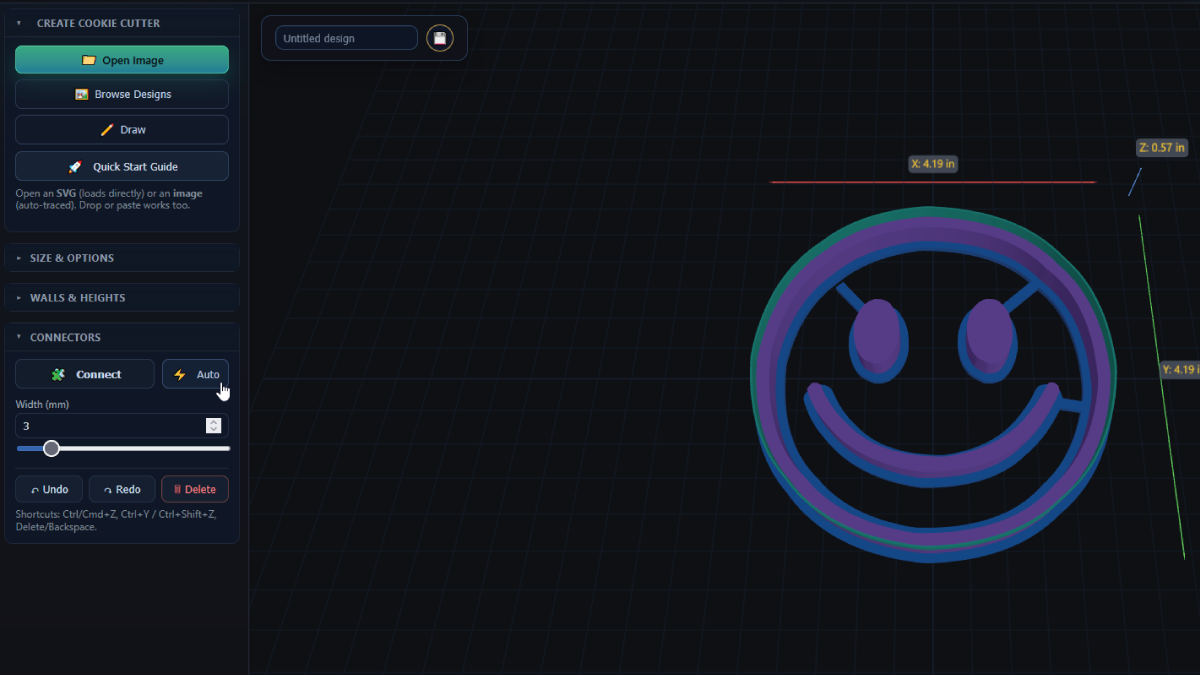
Step 3: Manually connect what's left
If islands remain, choose Connect and click from one location to another to add a bridge. For strength and easy release, match connector thickness to your wall width.

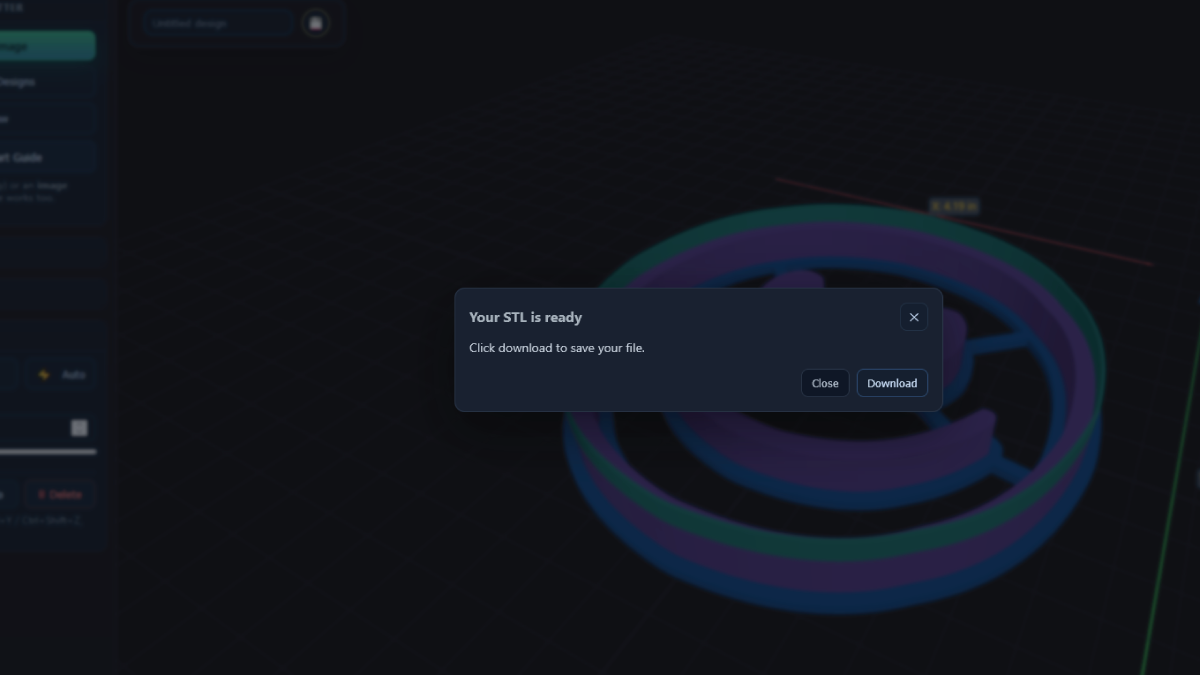
Step 4: Download or order printed
When everything's connected, click Download Cookie Cutter to get the STL (uses 1 credit), or choose Order Printed Cutter to have it printed and mailed to you.
FAQ
What counts as a floating island?
Any interior detail that doesn't touch the main wall. Without a connector, it would print loose and break off.
Auto didn't fix everything - what now?
Use Connect to place bridges manually. Aim for a thickness similar to your wall to balance strength and release.
Can I move or remove connectors?
Yes - select a connector to reposition or delete it, then add a new one at a better angle if needed.
How do I get my cutter?
Click Download Cookie Cutter for the STL (1 credit), or Order Printed Cutter to receive a finished print by mail.
Next up
-
How to paste an image and turn it into a cookie cutter
Copy-paste an image, trace it cleanly, and prep it for cutters or stamps.
-
How to adjust layer widths & heights (Walls & Heights panel)
Dial in wall and rim widths so cutters stay strong and release cleanly.